Volvo VIDA DiCE diagnostic scanner new package comes with 2 software DVDs/CDs (old package comes with 1 software CD only). Setting up 2 software CDs is different from 1 CD.
Note: If you have only 1 software CD, follow instruction here to install VIDA 2014D.
http://vidadice.blogspot.com/2017/11/install-volvo-vida-dice-2014d-on-windows-7.html
If you have 2 software CDs in DiCE package, follow guide below to install software.
How to install Volvo VIDA 2014D with 2 Software CDs on Windows 7 64 bit?
Volvo Vida Dice Requirement on computer:
1. It must be Windows 7 professional operating system
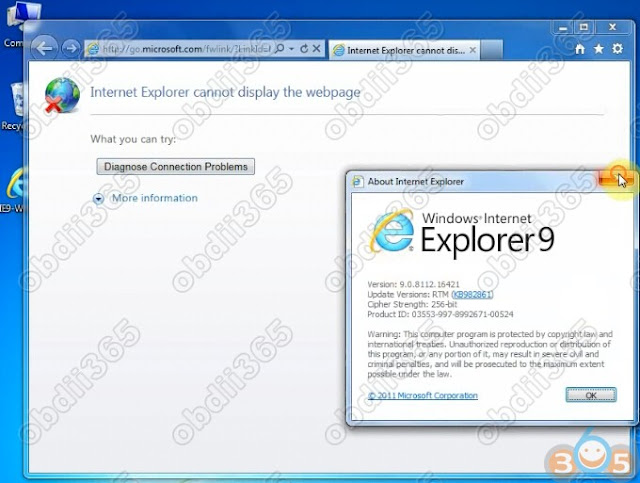
2. It need to be Internet Explorer 9 !!!
3. Computer memory needs to over 3GRAM
4. C:// must have 40GB space
5. Software must be installed under C://
6. It must be NTFS format
Step 1: Install VIDA Setup
Launch Windows Internet Explorer 9
Click on Setup->About Internet Explorer
Delete IE9 Windows 7 x86 enu shortcut on desktop
Open VIDA2014.1 software CD
Copy VIDA2014D.part1 and paste it to Computer/Software (D:)
Open VIDA2014.1 software CD
Copy VIDA2014D.part1 and paste it to Computer/Software (D:)
Open VIDA2014D.2 software CD
Copy VIDA2014D.part2 and paste it to Computer/Disk D
Then extra VIDA2014D.part1 zip file
Open VIDA2014D.part1 folder
Copy and paste Patch VIDA 2014-A-B-C-D to desktop
Open Software (D:)/VIDA2014D folder->Install->DVD->Vida_dvdheader->Main
Run Setup as Administrator
Select software language
Choose destination location C://VIDA/, press Next
Accept license agreement,press Next
Installing Framework35
VIDA installation in progress. Wait until the installation is completed
Installation complete will generate a few files on desktop
open Vida Configurator
Select connection type to central systems as "Internet" and Save
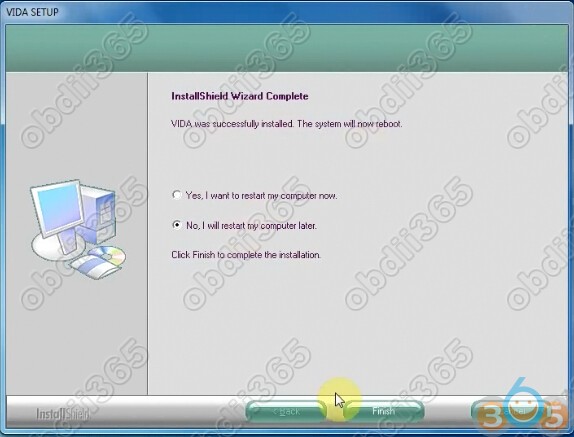
VIDA Setup finished, select restart computer later
Step 2: Install Patch VIDA 2014D
Extra Patch VIDA zip file and paste patch 2014A.exe on desktop
Install patch, select destination folder to C://,press Install
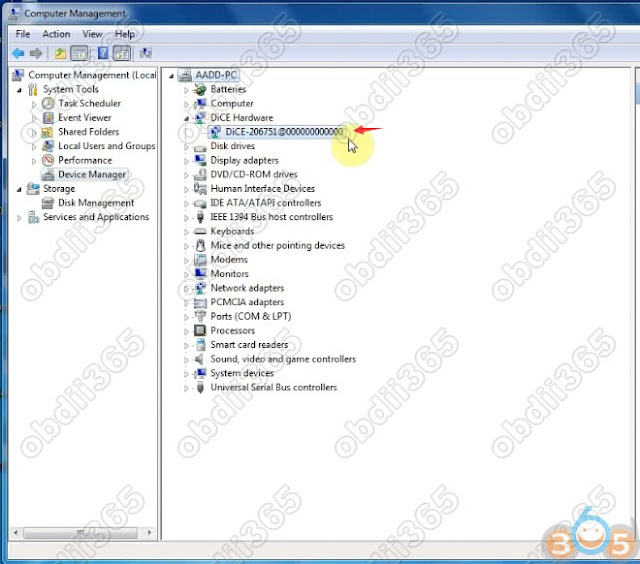
Connect Volvo DiCE interface with computer via USB port System will automatically install the driver DiCE-206751 @ 000000000000 device driver successfully installed
Allow windows firewall access
Delete Patch, Adobe Reader XI and 2014A.exe on desktop
Step 3: Run Self Test
Run Vida All-in-one as Administrator
Enter Username:1 and log in
Open Computer->Manager->Device Manager->DiCE Hardware to check scanner is well connected
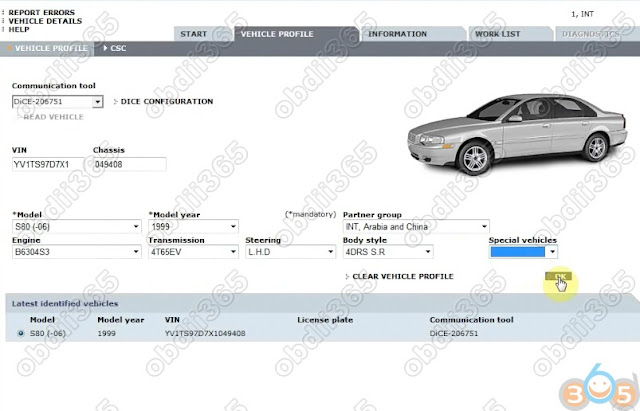
Define vehicle profile
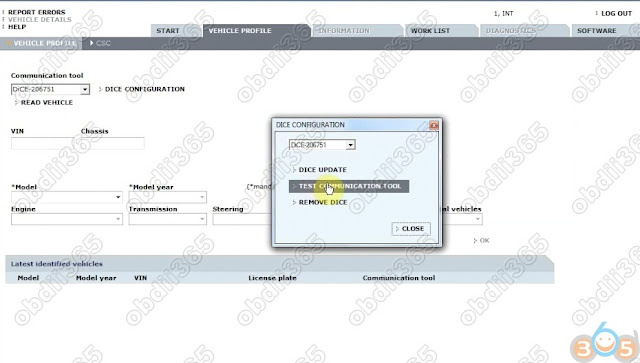
Select Communication Tool: DiCE-206751
Press DICE Configuration->Test Communication Tool
Click Run to run self test
Self test okay
Connect DiCE unit with vehicle
Read vehicle information and run diagnostic function






No comments:
Post a Comment