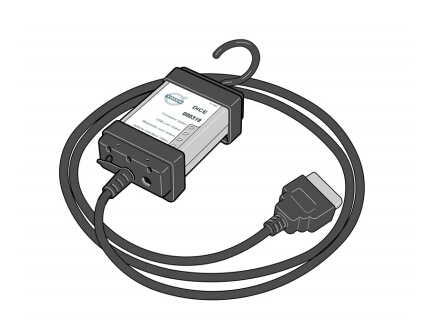
– Diagnostic Communication Equipment is a tool that is used together with VIDA All-in-One to communicate with the vehicle. Communication makes diagnosing and troubleshooting the vehicle possible, as well as the downloading of software.
Volvo VIDA DiCE uses Bluetooth to transfer information wirelessly between the vehicle and VIDA All-in-One. This gives the technicians more flexibility. A USB cable can be used as an alternative to Bluetooth.
1.1 Support For general support and questions concerning DiCE, submit a Help Request via www.volvotechinfo.com.
Getting started
1.2 Uninstalling built-in Bluetooth
If you have built-in Bluetooth on your client or Panasonic Toughbook CF30 (purchased prior to February 2008) it has to be uninstalled for DiCE to work properly.
1.3 Install the latest Vida edition
Install the latest version of VIDA and all applicable eUpdates, prior to beginning this installation process. The most current information concerning VIDA is available on Volvotechinfo.
1.4 Plug in of the supported Bluetooth USB adapter
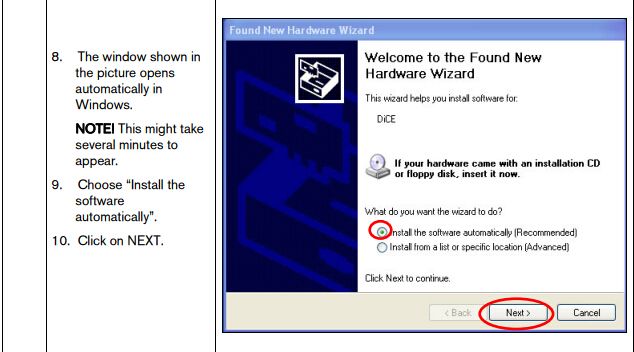
Insert the Bluetooth adapter (9513005) along with the USB cable (9513007).Several installation images will appear, with the below image finally appearing:
Note! The only supporting Bluetooth adapter is the Volvo supplied adapter, part number 9513005.

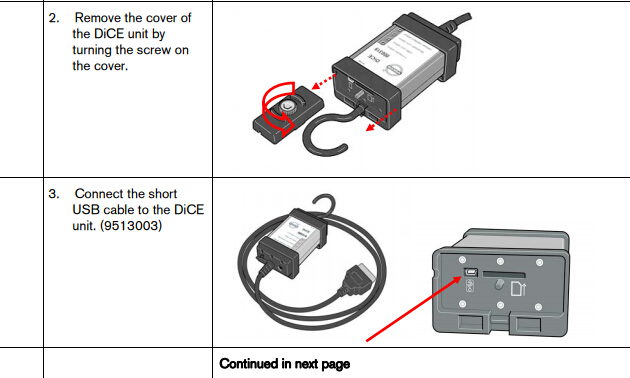
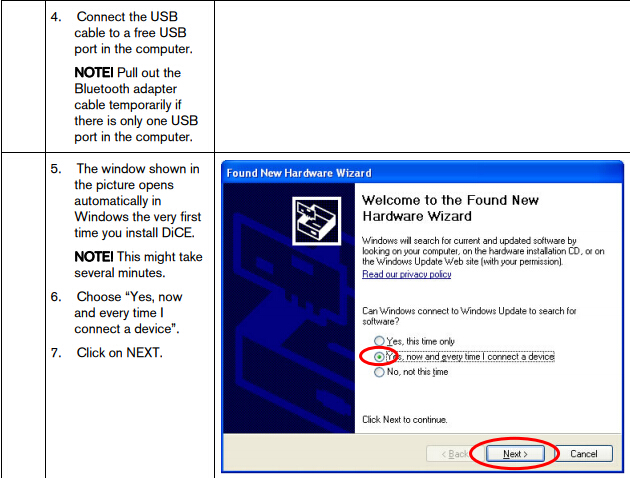
1.5 Installation of USB driver for DiCE
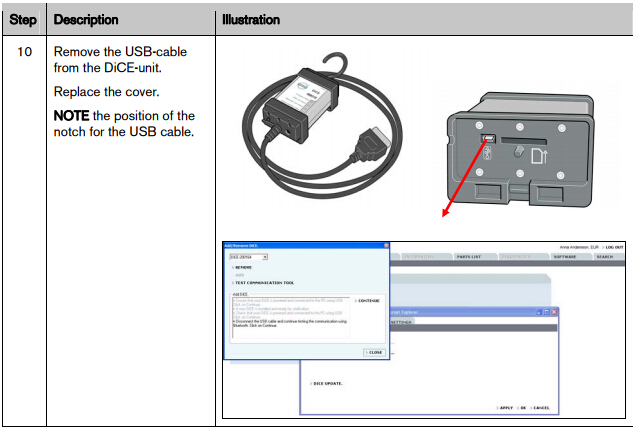
For each new or additional DiCE unit that is going to be used in VIDA, the USB driver must be installed separately. This is done automatically in Windows when the DiCE unit is inserted into a USB port. Carry out the instructions below.

1.6 Adding the DiCE Unit into Volvo VIDA
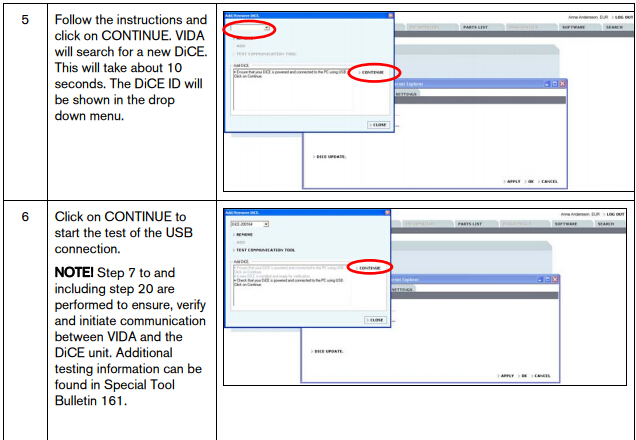
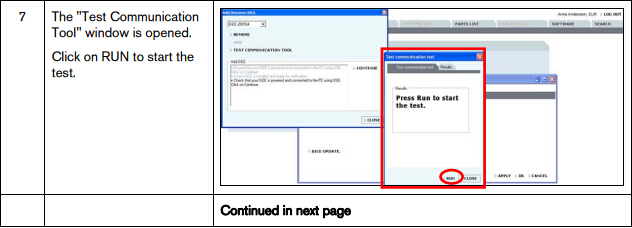
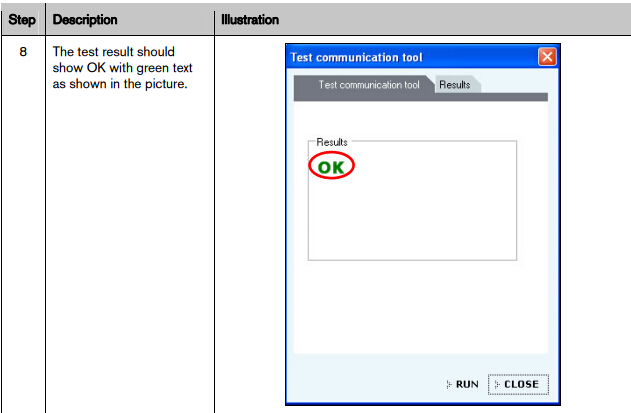
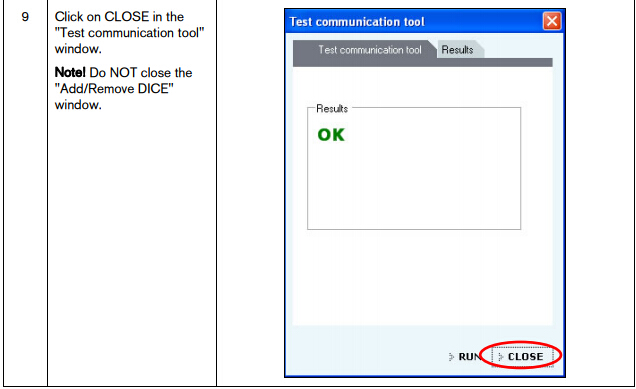
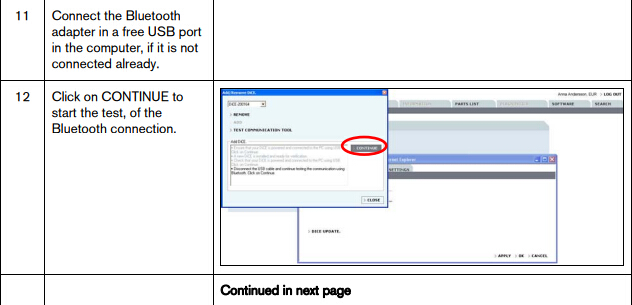
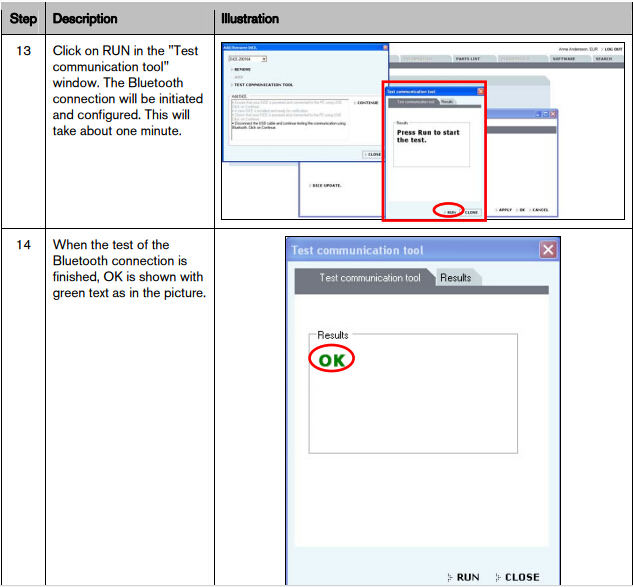
To add a DiCE, carry out the following:
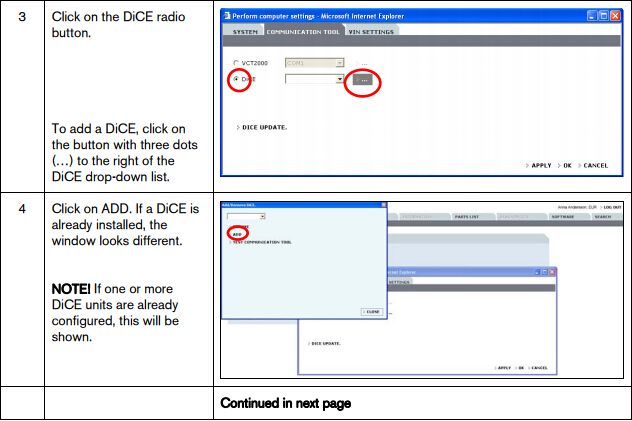
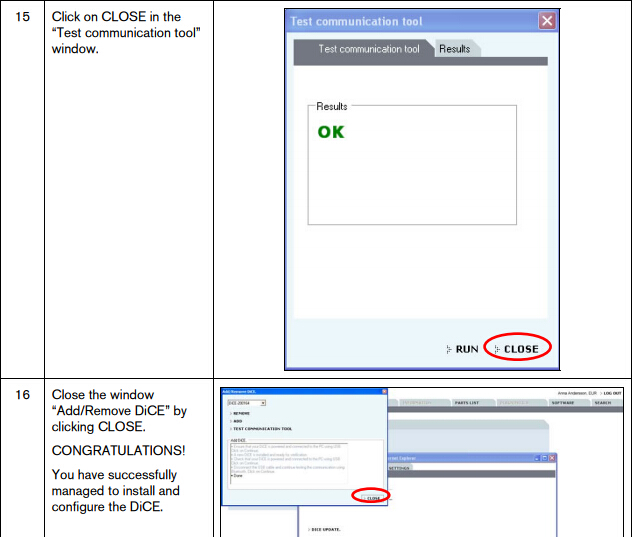
The DiCE unit is now configured for both USB and Bluetooth connection at the VIDA client. To set DiCE as the default communication tool, see section 1.7
NOTE! If DiCE is connected with a USB cable, the communication will always go through USB.
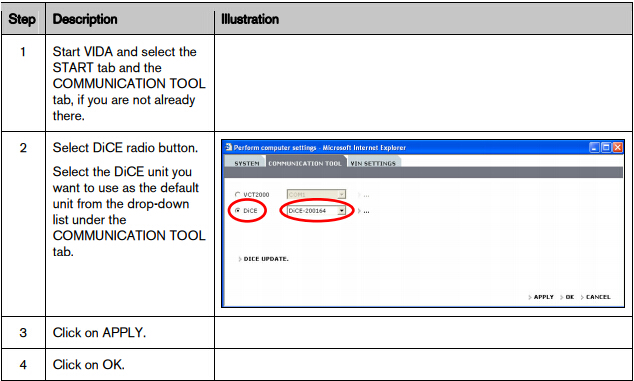
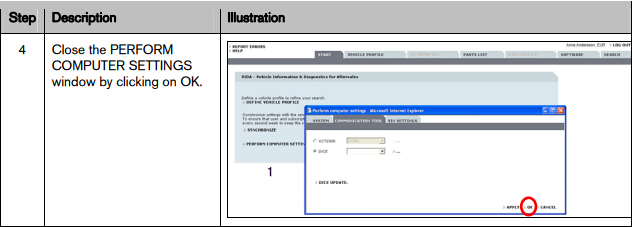
1.7 Choose default communication tool in VIDA
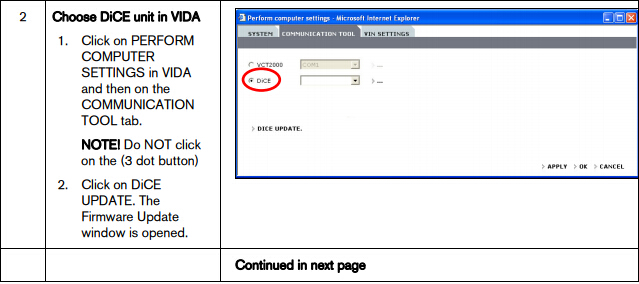
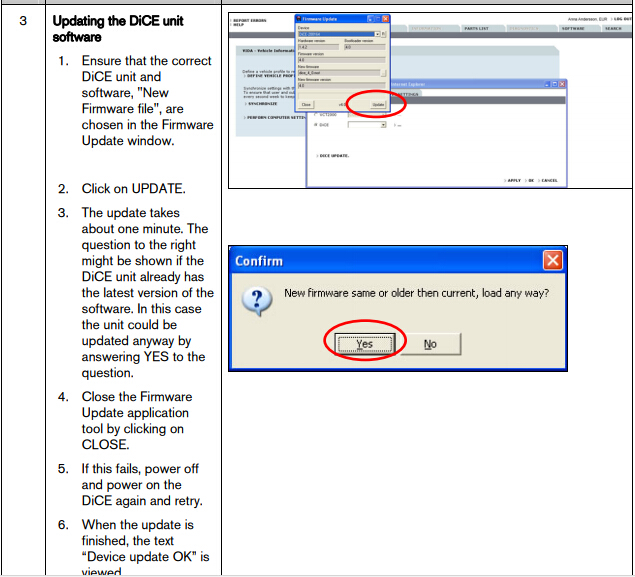
1.8 Check and update of internal software in DiCE unit
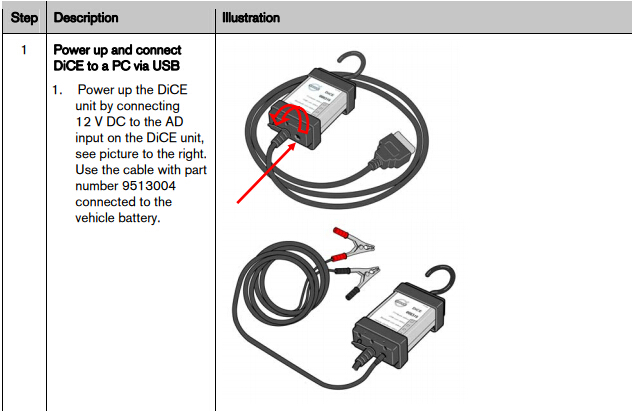
Updating of the internal software (also called Firmware) in a DiCE unit is done via the VIDA All-in-one client. When updating the firmware, the DiCE unit shall be connected with a USB cable and 12 V power supply. Ensure that the Firmware status LED is flashing green.
USB connection is a safer data transmission than Bluetooth. Reliable transmission is important when updating the firmware.
See detailed instructions on next page.
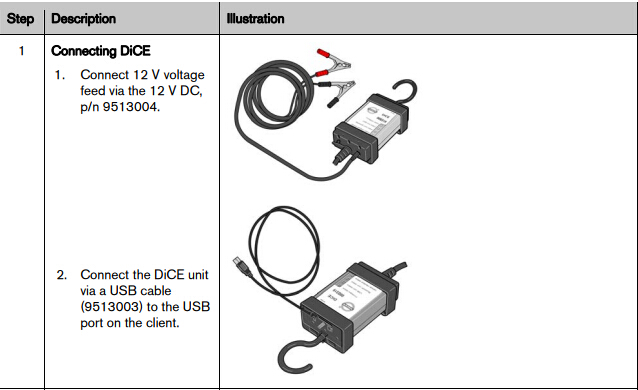
1.9 Connecting Volvo DiCE to a vehicle
Connecting DiCE to a vehicle is very easy. Follow the steps below.
1. Ensure that the Bluetooth adapter or USB cable is connected to the VIDA client.
2. Always ensure that the vehicle is connected to a battery charger before connecting DiCE to the vehicle. DiCE is powered by the vehicle, not via USB.
3. Connect DiCE to the diagnostic socket or OBD connector in the vehicle. Hang unit where it is visible or place on the roof top through the driver's window. Put the ignition key in position II.
4. Start VIDA All-in-One.
5. Ensure that the correct DiCE unit serial number is chosen in VIDA.
6. Choose the VEHICLE PROFILE tab in VIDA.
7. Click on READ VEHICLE to read the VIN number of the vehicle.
8. All other functions regarding vehicle diagnostics and software downloading remain the same as with VCT2000.
1.10 Removing a DiCE unit
All DiCE units that are installed and added to a VIDA client will become Communication tools that can be selected. To remove a DiCE unit, carry out the following:
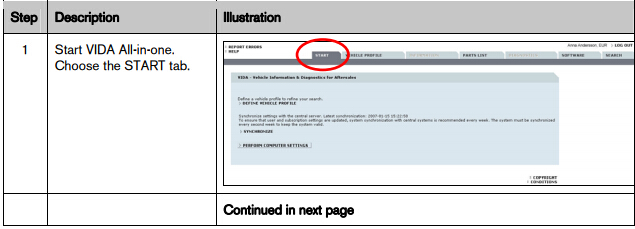
1. Start VIDA All-in-one. Select the START tab.
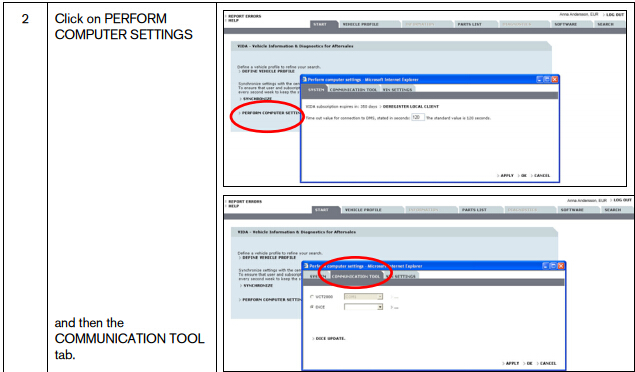
2. Click on PERFORM COMPUTER SETTINGS and then the COMMUNICATION TOOL tab.
3. Click on the dots beside the DiCE option in the drop-down list for COMMUNICATION TOOL.
4. In the DiCE unit drop-down list, select a DiCE unit to be removed and click on REMOVE.
No comments:
Post a Comment